For a while now I’ve been wanting to install and try out an open source firewall that’s a bit more full-featured than the usual UFW you get on Debian-based distros, so today we’ll go through installing and configuring pfSense in a virtual environment, and run a few tests.
pfSense is an open source firewall based on FreeBSD; the company behind it also sells a hardware version, both for home users and enterprise customers, plus there are cloud versions for AWS and Microsoft Azure.
This firewall packs plenty of the classic features you’d expect from paid alternatives: Stateful Packet Inspection, GeoIP blocking, Reverse Proxy, VLAN, VPN, NAT, Layer 7 application detection, Deep Packet Inspection, and more.
You can find more info on their site: https://www.pfsense.org/
Lab setup
The lab will have 3 virtual machines: a desktop running Xubuntu, a server running Ubuntu (CLI), and the VM hosting our pfSense firewall — all managed through VirtualBox.
The network layout is as follows:
- Firewall VM (pfSense) with 2 networks: one NAT and one internal network (no internet)
- Desktop VM (Xubuntu) on the internal network only
- Server VM (Ubuntu) on the internal network only
The firewall’s NAT network uses the 10.0.2.0/24 range and is the only one with internet access. The internal network uses the 192.168.0.0/16 range.
pfSense’s default configuration uses the admin credentials
user: admin
password: pfsense
You can find more information on the pfSense installation process here: https://docs.netgate.com/pfsense/en/latest/config/setup-wizard.html
Installing pfSense
Let’s mount the pfSense ISO in our virtual machine and boot it up — this is the first screen we’ll see:

The second step asks you to choose a keymap to correctly map your keyboard.

The third step is about disk partitioning — if you don’t have specific requirements, leave it on auto and pick UEFI or BIOS depending on how your VM is configured:

After a few minutes, the installation finishes with this screen — let’s proceed and reboot the VM.

Here’s our pfSense firewall up and running after the reboot:

As you can see, the WAN and LAN interfaces come pre-configured with standard addressing; you can change these settings directly from the shell, or through the web interface once you set your own parameters.
You can’t modify the WAN network since it’s managed directly by VirtualBox (unless you specifically want the firewall to have no internet access).
Configuring pfSense
We’ll configure things through the browser, though you can also do it from the command line directly on the machine. The firewall’s web interface is reachable via IP address (or DNS name once configured) on port 443 over HTTPS.
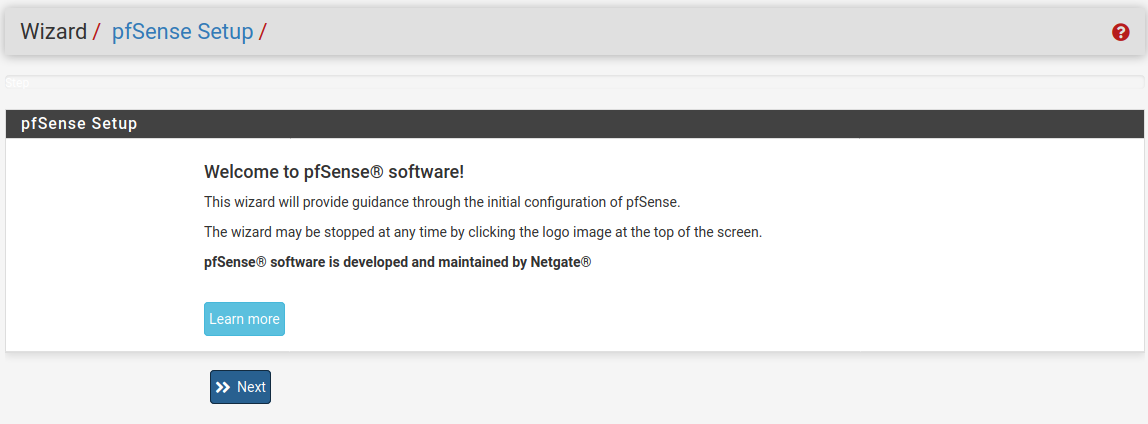
This is the first screen the setup wizard shows us:
Let’s start by entering the hostname, domain, and DNS server info:

In our setup we’ll go with:
- HOSTNAME: firewall
- DOMAIN: home
- PRIMARY DNS: leave it blank
- SECONDARY DNS: leave it blank
- OVERRIDE DNS: uncheck the DNS override
Step 3 covers Time Server and timezone settings:

we’ll leave the default NTP server pfSense suggests and just change the timezone to Europe/Rome.
The next screen is about the WAN configuration:

we’ll leave everything at the firewall’s suggested defaults and move on to the LAN configuration:

After step 5 we can set a new password for the web interface, then continue to the end, where we’ll be asked to reload the new settings.
Rule setup — Block SSH
The scenario I want to walk through is a simple one: we’ll block outbound SSH traffic to a specific IP.
In the top menu of pfSense’s web interface, go to Firewall -> Rules.
Go to the LAN tab and click “Add” — we’ll move the rule around later.
N.B.: Firewall rules are evaluated top to bottom — once a packet matches a rule, the ones after it aren’t evaluated.


In the “Destination Port Range” box you can either pick a range from the listed presets or set a custom range.
Let’s save the rule — the page will ask us to reload to apply the new rules to our firewall. Next we move our rule above the “any to any” rule and reload again; the new rule order will look like this:

Testing the rule
To test our custom rule, we’ll try connecting via SSH from the Xubuntu machine, then try connecting directly from the firewall itself.

As you can see in the image, the connection from Xubuntu just hangs, since our pfSense is blocking SSH traffic to that server. It’s blocking packets matching that specific Destination IP and port, so if our connection request were wrapped in another protocol (say, a VPN), or if we ran the SSH daemon on our server on a different port, we could easily get around the firewall.

Connecting directly from the firewall works fine, because the traffic goes out through the WAN interface (10.0.2.15), while our rule only applies to the LAN network.
Let’s see what happens from the Xubuntu VM if we disable the rule:


With the rule disabled, our pfSense obviously lets the connection go through and reach its destination.
Now let’s tighten the rule so it only applies to the Xubuntu desktop machine — we’ll edit the existing rule and set the source IP to our desktop VM’s address (192.168.1.100 in this case):

and here’s the result when we try connecting via SSH from the Ubuntu server:

Final thoughts
pfSense is a great tool for defending your network — it’s open source, and physical appliances with the system pre-installed are also available from the Netgate store.
That said, for some simpler use cases (like just blocking a few ports), it’s probably more convenient to use security groups (or the equivalent on other cloud providers) rather than having a whole extra system to manage. I’d say pfSense is a great option for a home firewall or for small/medium businesses, and it’s definitely worth playing with just to learn how this kind of appliance works, without spending anything.
Stay safe!